You can create a Google account directly on an Android cloud phone with GeeLark.
I'll walk you through the process, from setting up a cloud phone and configuring a proxy to creating a Google account.
What you need before getting started
Before creating a Google account, make sure you have the following:
GeeLark account: Sign up for GeeLark, download and install the desktop app. You'll use it to create and run an Android cloud phone.
Proxy: Prepare a working HTTP/HTTPS or SOCKS5 proxy. You'll need its IP address, port, username, and password (if required).
Google account information: Prepare the personal information you'll use to register your Google account.
SMS verification service: Google may ask for phone verification during registration, so prepare an SMS service that can receive Google verification codes.
That's all you need to get started. Next, I'll create a cloud phone in GeeLark.
Set up a cloud phone
Before opening Google, first create a cloud phone and configure its network environment. In GeeLark, the setup is simple: create a profile, add a proxy, check the device settings and launch the cloud phone.
1. Create a cloud phone profile
Open Profiles in GeeLark and click New profile.

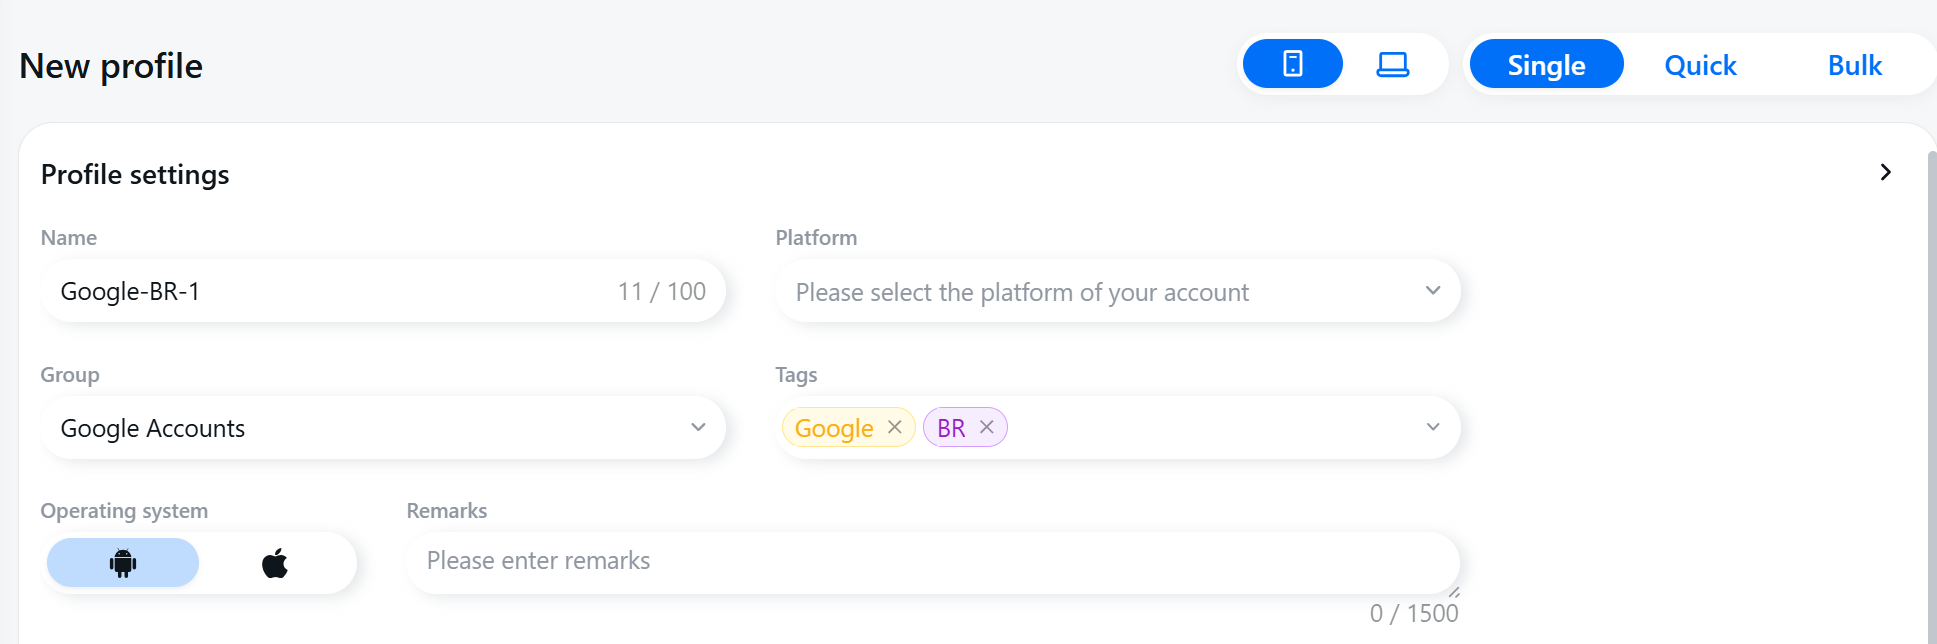
On the New profile page, fill in as much profile information as possible. These details make it much easier to find, filter, and manage your cloud phones later, especially when you have more than a few profiles.
For example, if you're creating a cloud phone for a U.S. Google account, you could use:
Name: Google-BR-1
Group: Google Accounts
Tags: Google, BR
Remarks: Add the account purpose, campaign name, or any other notes your team may need later.
You can use a different naming format, but make sure the profile name, group, tags, and remarks clearly show what the cloud phone is used for and which account or region it belongs to.
2. Add your proxy
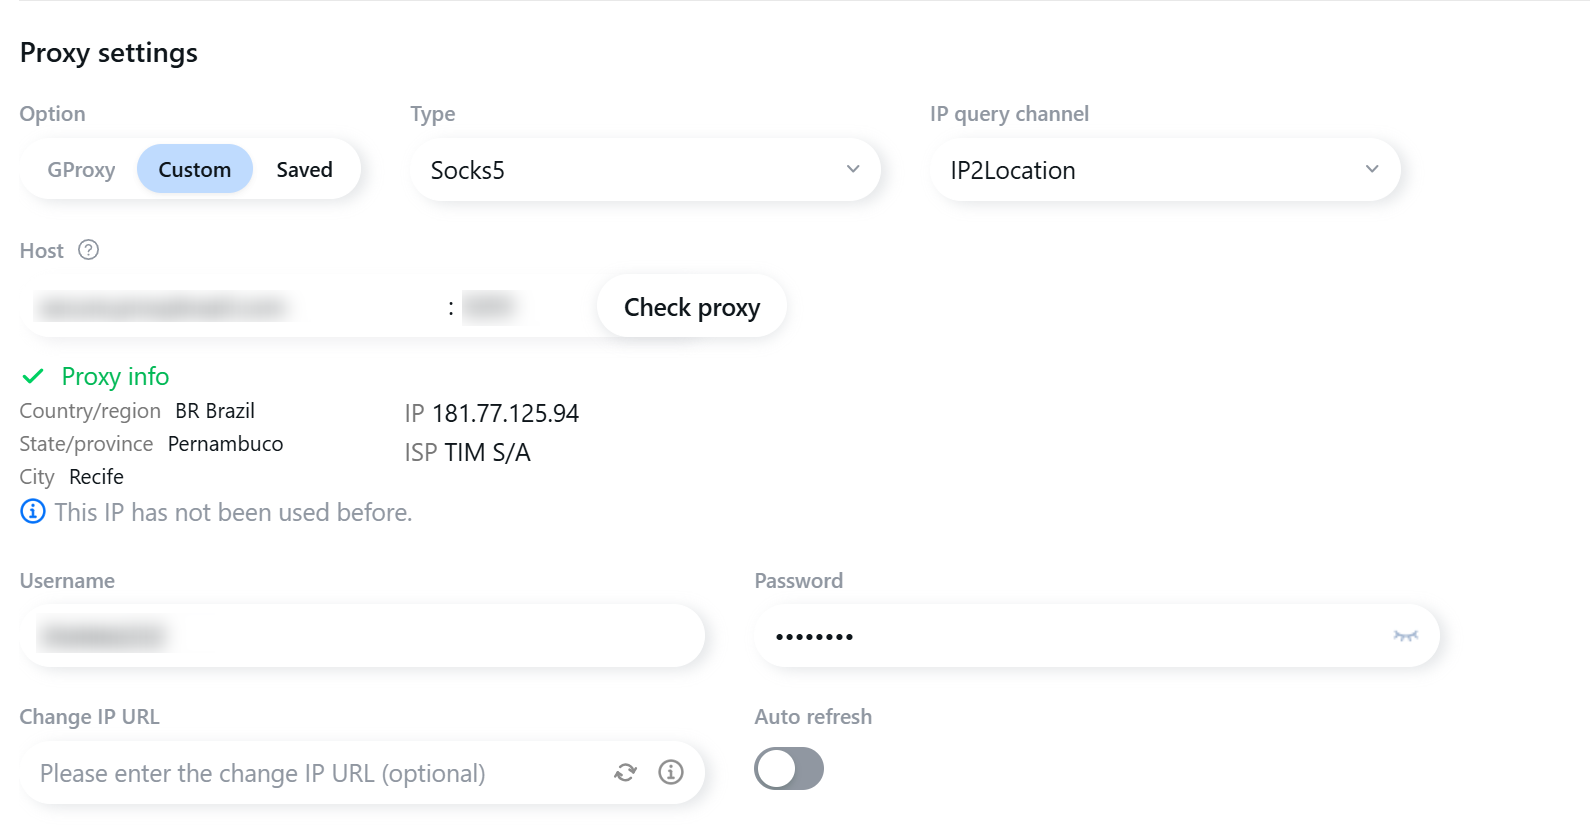
Go to Proxy settings. You can enter a new proxy or choose one from your saved proxies. For this test, I used a Brazilian proxy.
After entering the proxy details, click Check proxy. GeeLark will display the proxy’s location, ISP, and IP address.
3. Configure the device information
Next, choose the device and environment settings for your cloud phone:
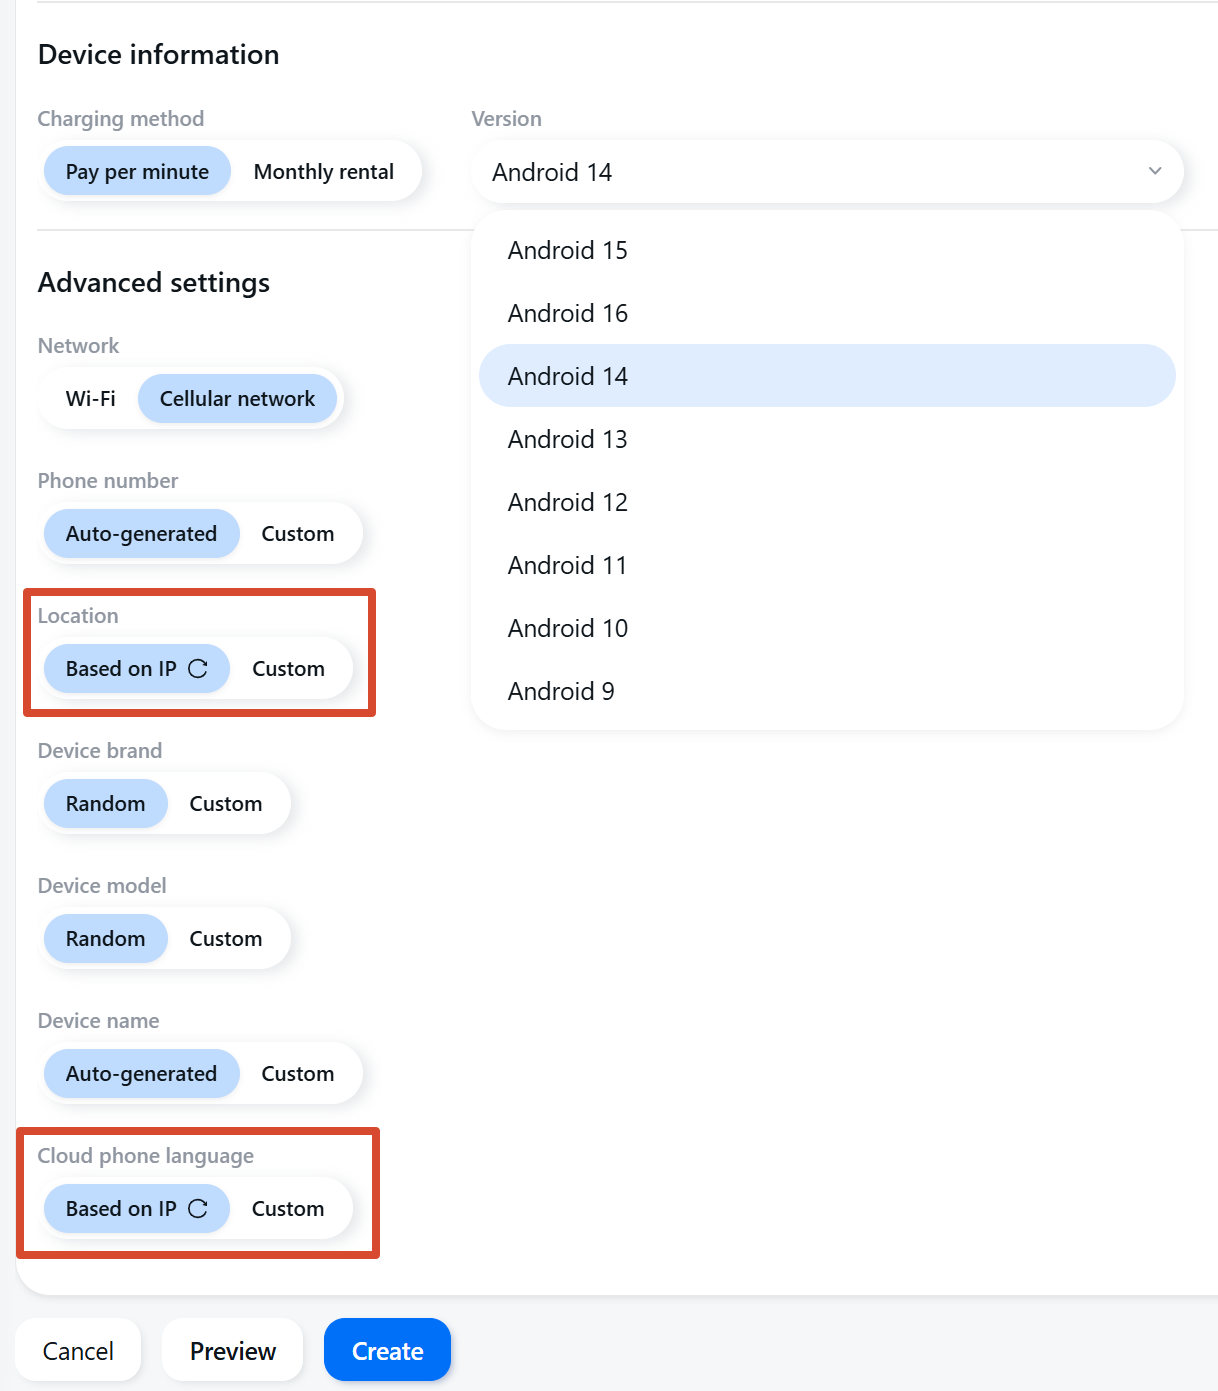
Charging method: You can chose Pay per minute ($0.007/min, daily cap of $1.20 for paid subscriptions).
Android version: Choose any version from Android 9 to Android 16.
Network: This controls how the cloud phone appears to connect to the internet. Wi-Fi makes it look like the device is using a Wi-Fi connection, while Cellular network makes it appear to be using mobile data. Your proxy still controls the IP address.
Phone number: Let GeeLark generate one, or enter one manually. This number does not receive SMS verification codes.
Location: GeeLark will match the cloud phone’s GPS location to the proxy region, so the network and location settings stay consistent.
Device brand and model: Use Random, or choose a specific device such as Samsung Galaxy S22.
Once everything is ready, click Create to create the cloud phone.
4. Start the cloud phone
After creating the profile, return to Profiles. Find the cloud phone you just created and click Start.
Even if you’re not in the U.S., you can use a U.S. proxy with GeeLark to create a cloud phone that uses a U.S. IP and U.S. GPS location. You still control the cloud phone from your own computer.

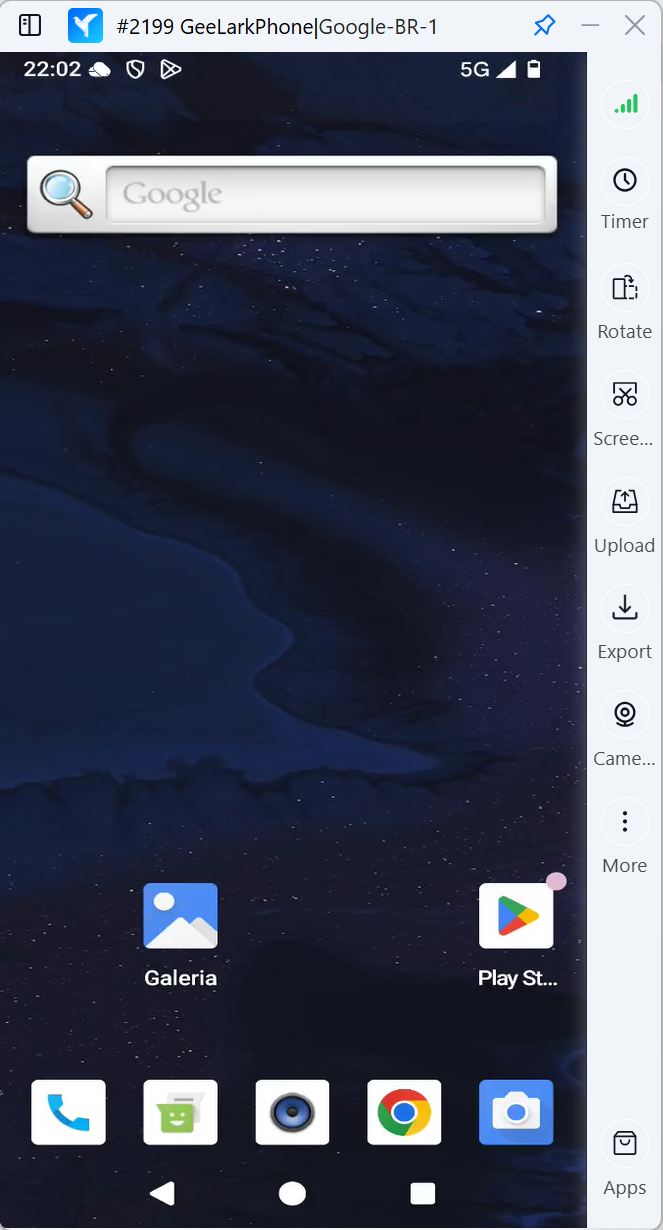
Create Your Android Cloud Phone
Create a new Google account on the cloud phone
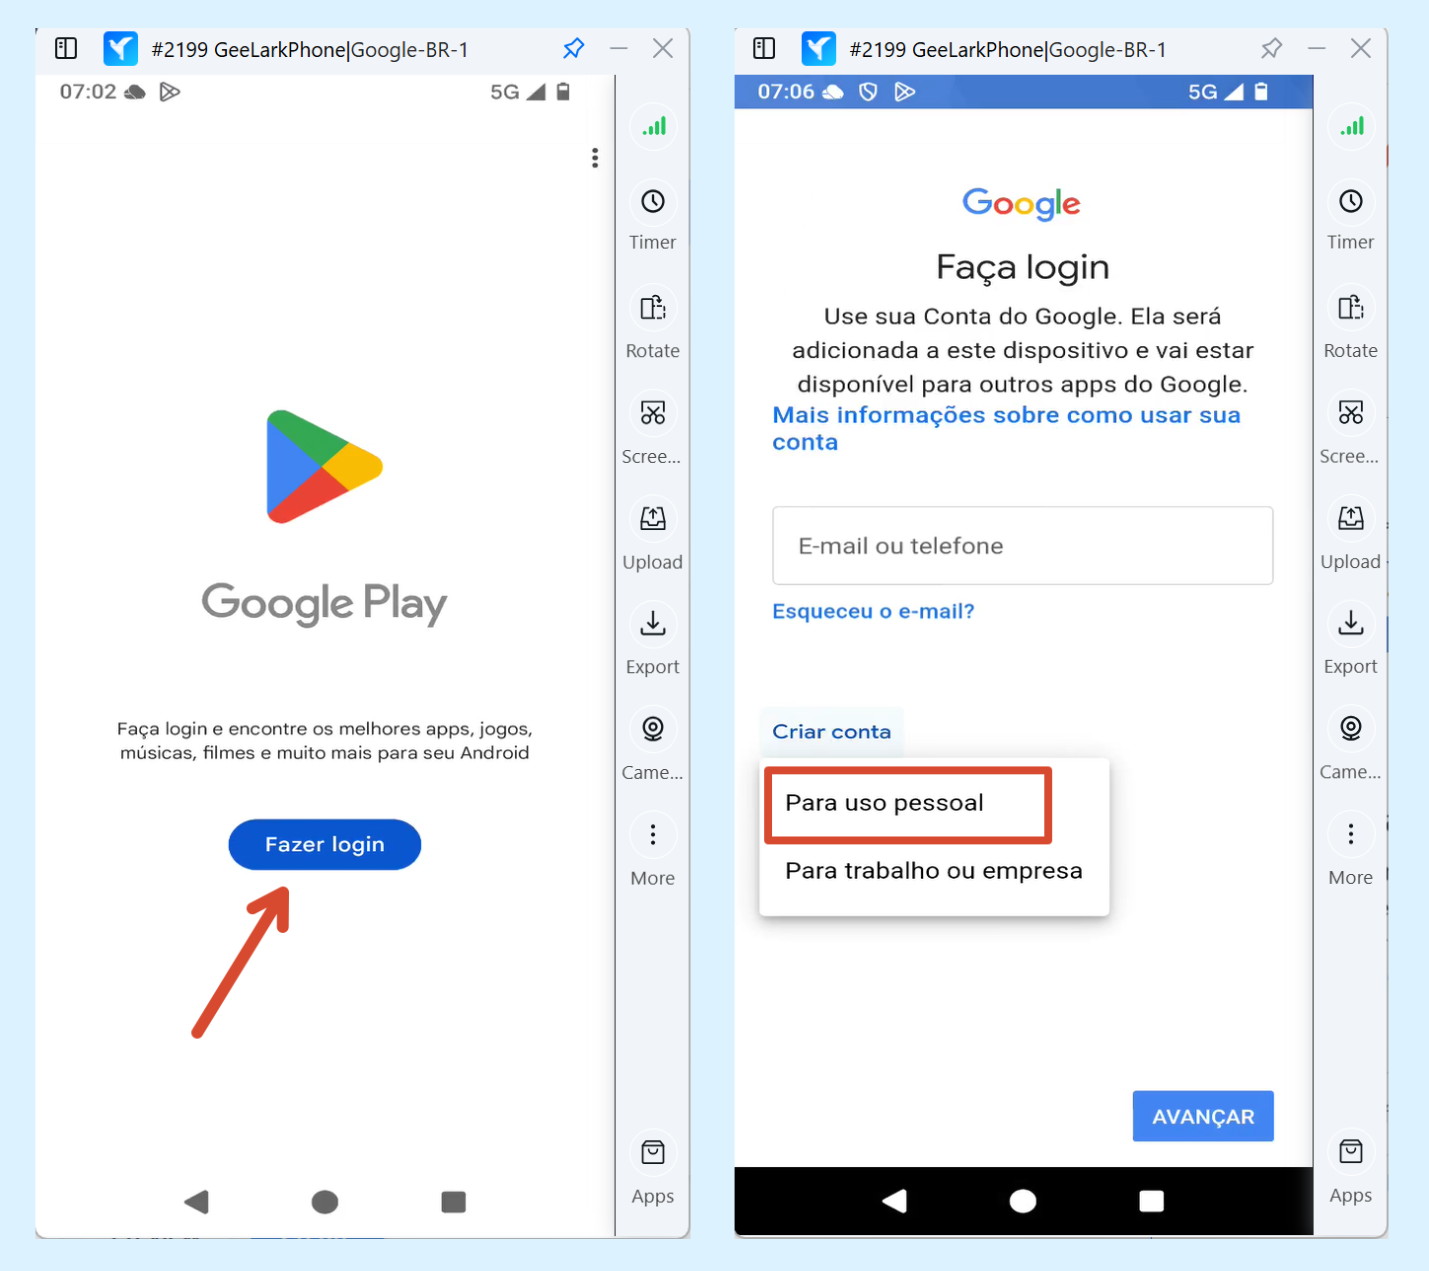
1.Open Google Play
Tap Sign in, then choose Create account → For my personal use.
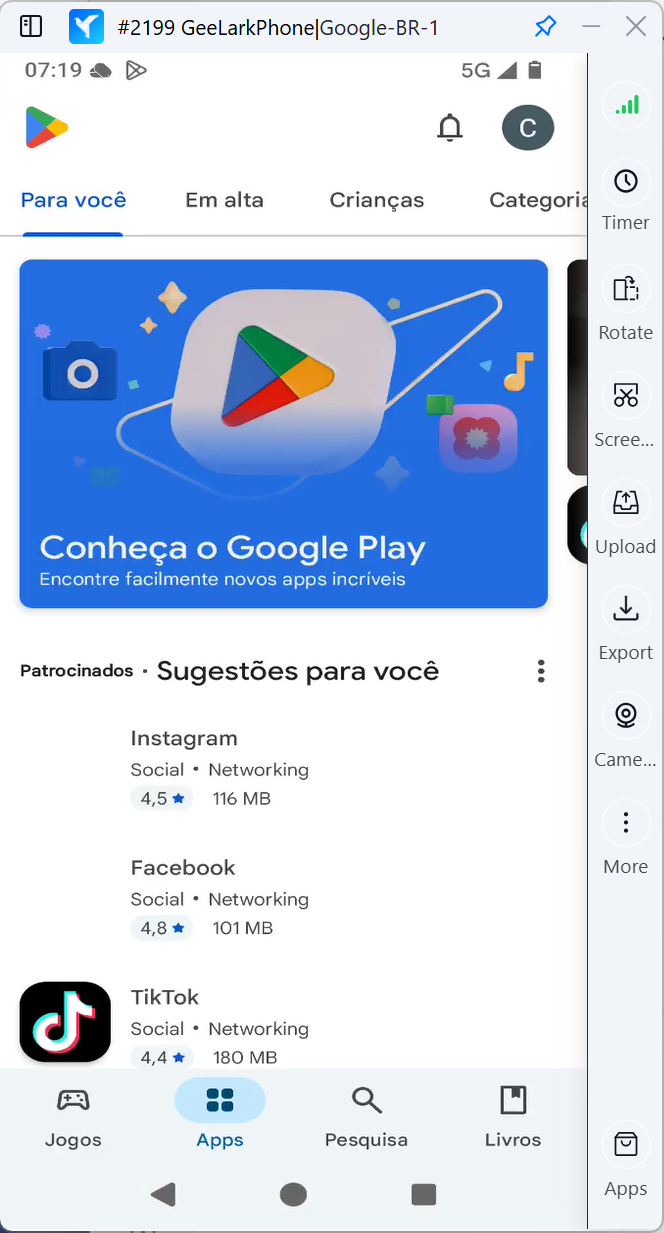
I’m using a Brazilian proxy, and the cloud phone language is set to Based on IP, so Google Play opened in Portuguese.
2.Enter the account information
Google will ask for details such as your name, birthday, and gender. Fill them in and continue.
3. Create the account with a phone number
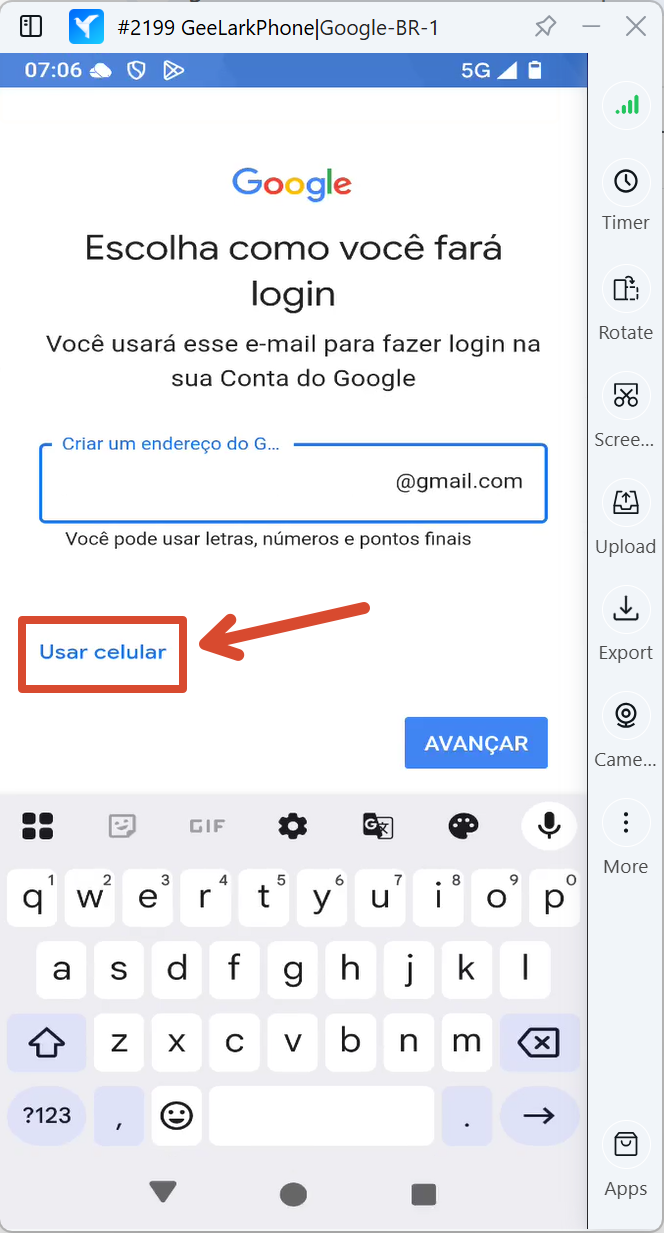
When I reached the screen for choosing a Gmail address, I selected Use phone instead.
4.Verify the phone number
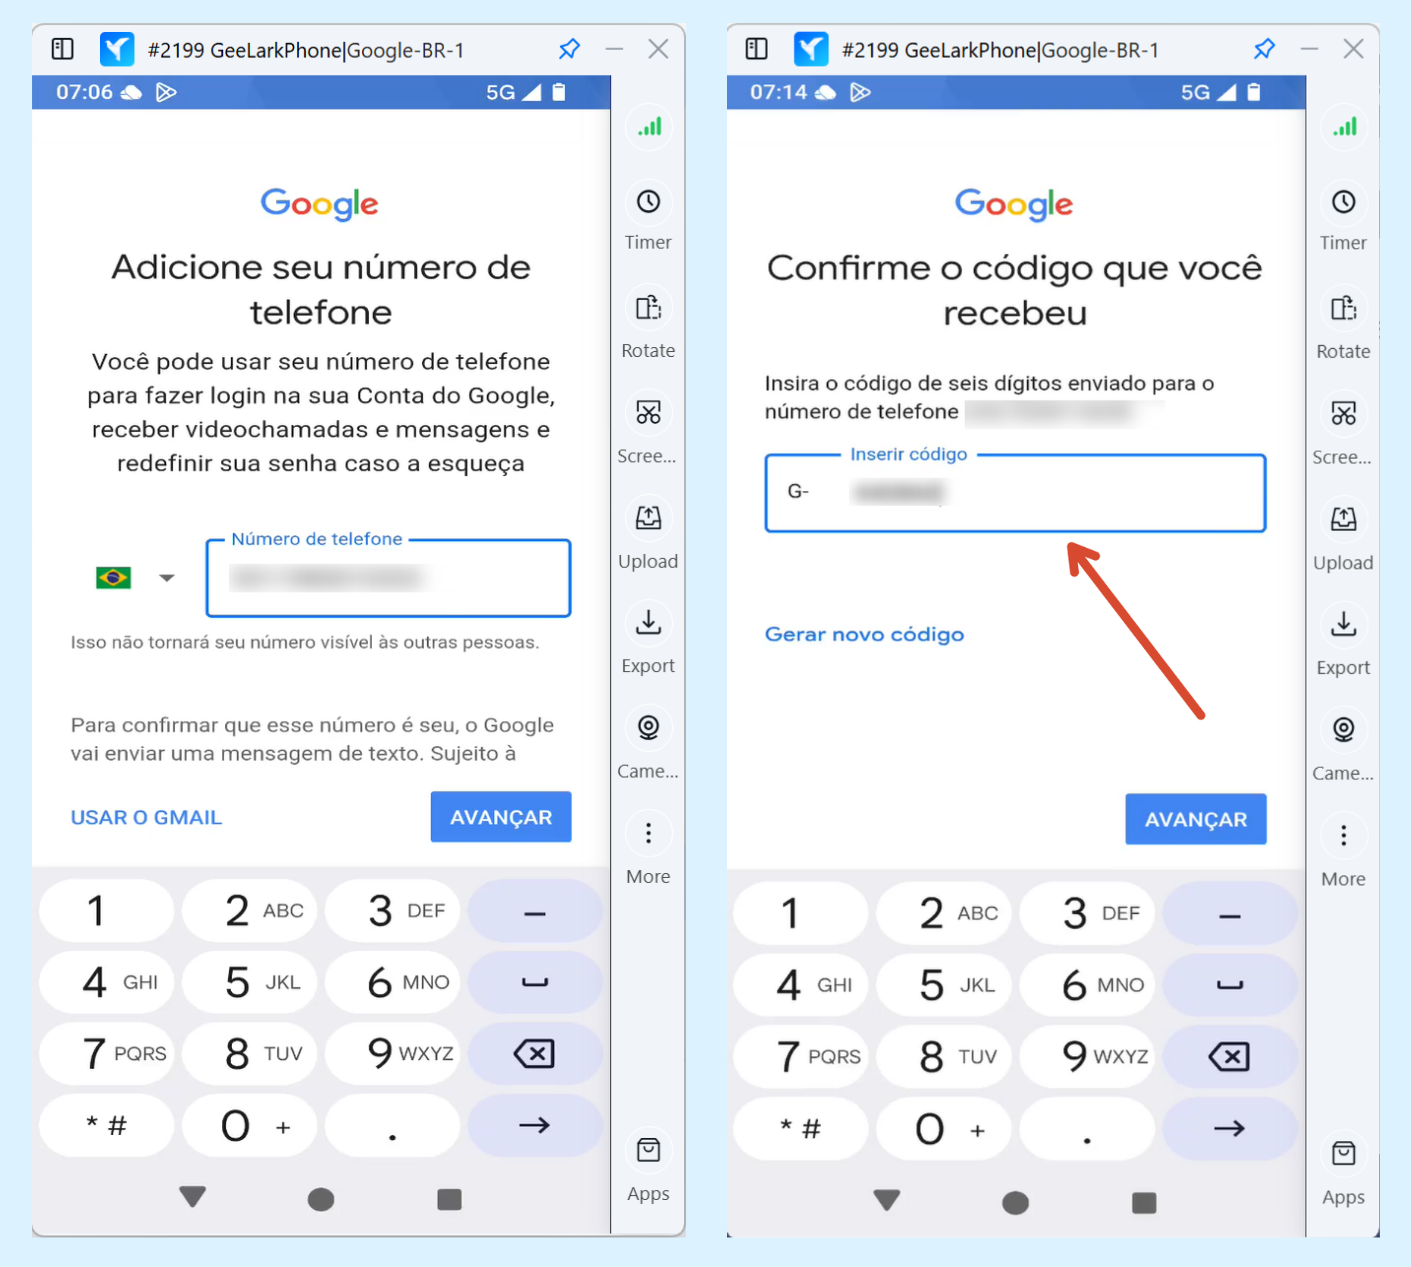
Since I was using a Brazilian setup, I used a Brazilian number from the SMS service I had prepared.
Enter the number, wait for Google to send the verification code, then enter the code on the cloud phone.
5. Review the account details
After verification, Google will show the account information and the Gmail address created for the account. Check that everything looks right, then continue.
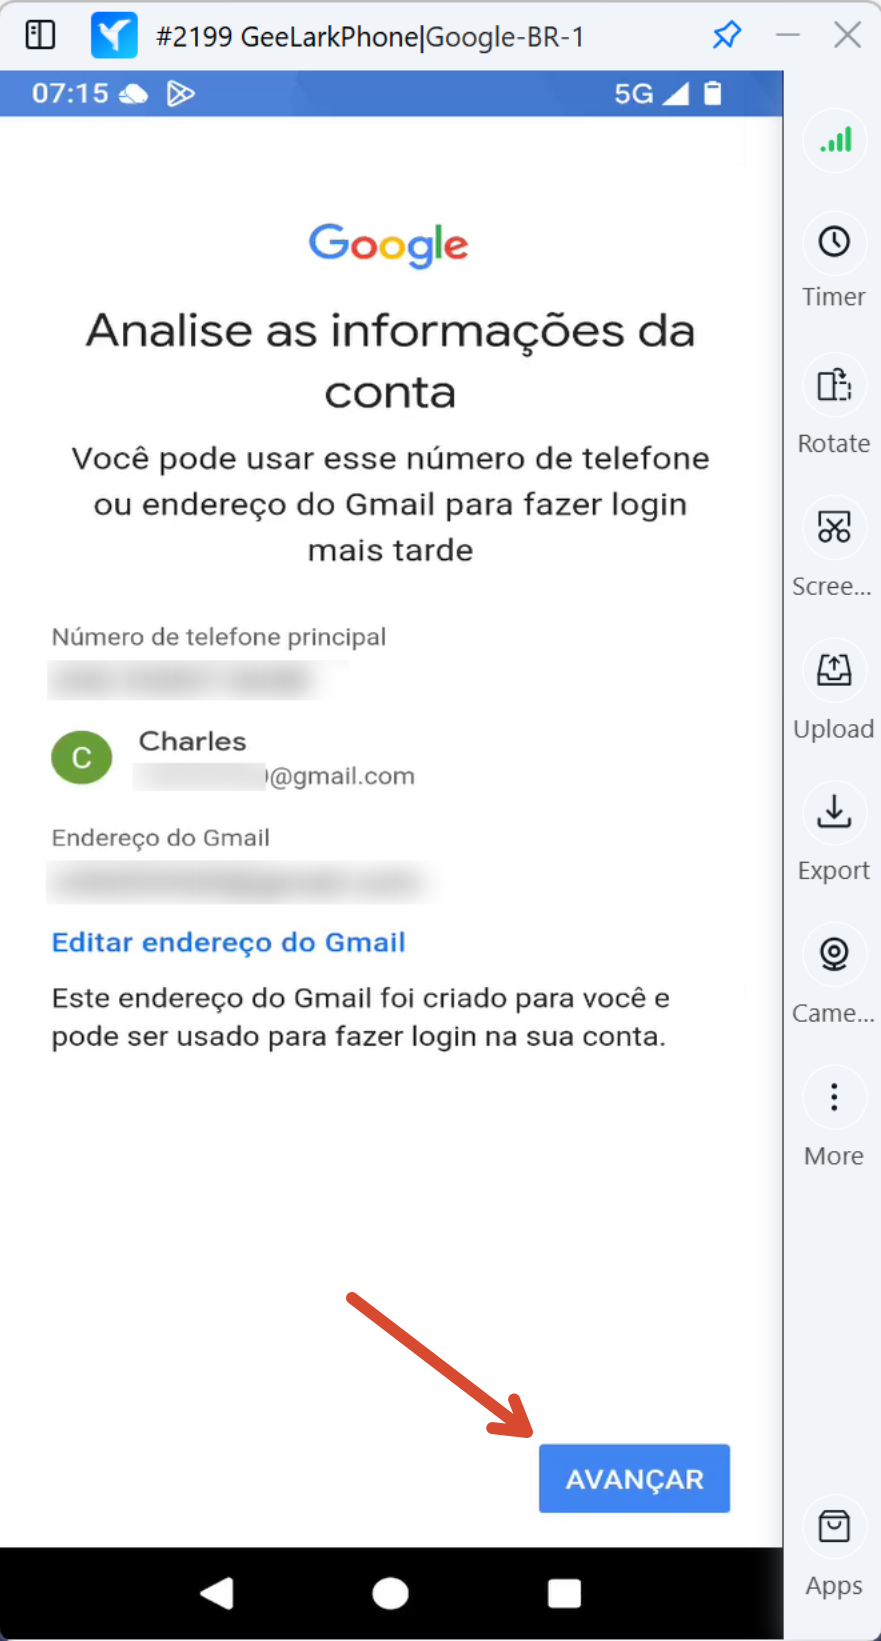
6.Finish the remaining setup
Complete the remaining setup steps. When Google Play opens with the new account signed in, the registration is complete.
What if you don’t see the “Use phone” option?
Google doesn’t always use the same sign-up flow in every region.
In my test, using a Brazilian proxy showed the Use phone option, so I could enter a phone number and receive an SMS verification code.
When I repeated the process with a U.S. proxy, that option didn’t appear. Google instead tried to verify the phone number already associated with the device.
This is likely related to Google’s different registration and security policies across regions. The sign-up flow can change depending on the country, network, and other signals Google checks.
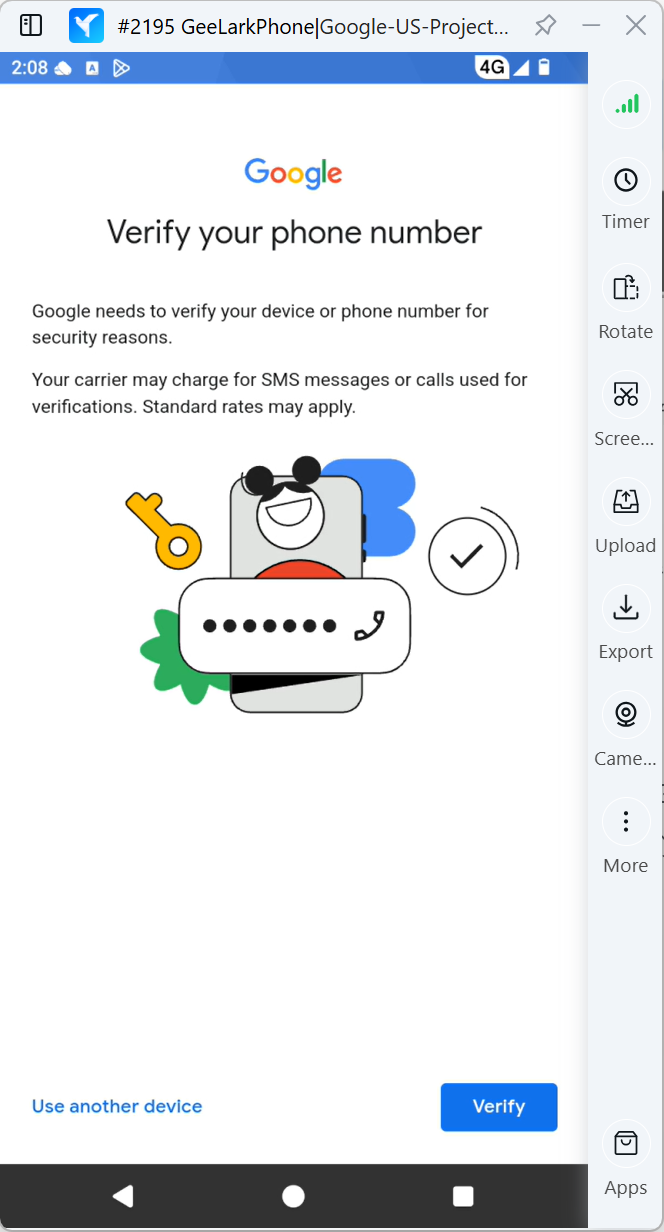
GeeLark can generate a phone number that matches the cloud phone’s region, but that number is only part of the device information. It isn’t a real SIM number, so it can’t receive SMS verification codes.
Start Your Google Account Setup
FAQ
How many Google Accounts can I verify with one phone number?
Google doesn’t publish a fixed limit. If a number has been used too many times, Google may stop accepting it for new account verification.
What does “This phone number cannot be used for verification” mean?
It usually means Google won’t accept that number for this verification. One possible reason is that the number has already been used too many times to create or verify Google Accounts. Try another eligible number.
Why is Google asking me to scan a QR code during sign-up?
Google may use QR-code verification instead of asking you to enter a phone number directly. The sign-up flow can vary by device, region, and Google’s security checks.